Photographing under the cover of darkness is one of my favourite things to do, everything seems to come alive at night, and what isnt you can bring alive through various lighting techniques. I’ve noticed that more and more people are giving it a try as it can be easily be done with any SLR, tripod, shutter release and a flashgun or torch.
Getting the correct frame
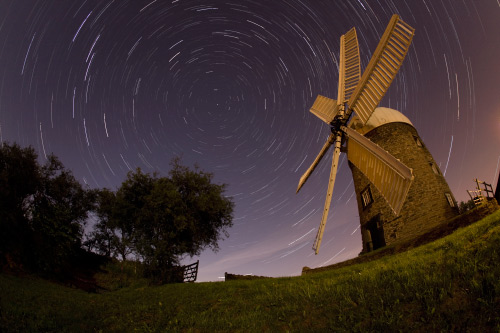
In my opinion the two main fundamentals of night photography are composition and exposure, I tend to keep within the rule of thirds, always shooting from low angles on a 17mm wide-angle lens or 15mm fisheye (on a full frame camera) keeping an equal amount of foreground and sky. Using lenses like these give very nice perspective distortion which I feel compliments many of my photographs.
When setting up your composition be sure that nothing is in frame that you do not want, weather its beer cans that kids have left from their outings or a street light/car lights creeping into the corner of your frame (unless of course you want things like that in shot). In a few cases I have moved bits and bobs into the frame to kill any dead space.
Focusing in the dark
Once happy with your composition, take a few test shots. Check that everything is in focus and framed correctly. Focusing in total darkness can be an absolute pain but with your focus point set to the centre point, a high powered torch or laser pen focusing is easily obtainable. I normally will then take a test shot using the bulb function for a few seconds at around f/4, ISO 6400 though if your cameras ISO does not reach that high then the highest it will go for a few more seconds will do exactly the same.
Are you ready to shoot?
Getting on to taking the shot itself, I have always shot my exposures on ISO 200. A lot of people will disagree with me here, as they will swear by shooting at the lowest ISO possible to reduce noise caused by the exposure times, however I have never had any problems with excessive noise so I will continue shooting this way. I generally shoot around f/6.3 which keeps more of the subject in focus and the shot itself nice and sharp.
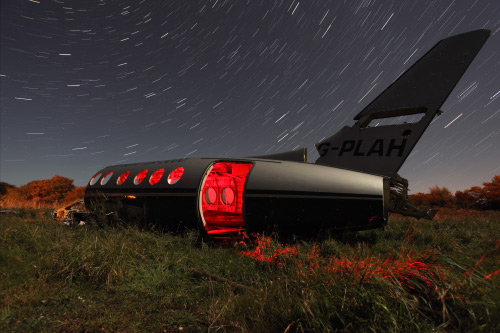
Achieving the correct exposure time can be a pain at first, I learnt through the trial and error process, taking note of what power flash is used, and where from and what kind of shadows etc I could create. I use a lot of colour in my photographs which gives them more character, for this I use coloured theatrical gels over the end of the flashgun or torch.
How long should I keep my shutter open for?
There are many different variables to this question depending on the brightness of the moon, the lights surrounding, how much you flash the subject and even the cloud coverage.
Shooting on ISO 200 f/6.3 in complete darkness I would say anything from 5 – 12minutes, this would also allow you to catch some of the star trails in the sky. If you shot on these settings under full moon I would say no longer than 4 minutes. Its all about trial and error in my eyes.
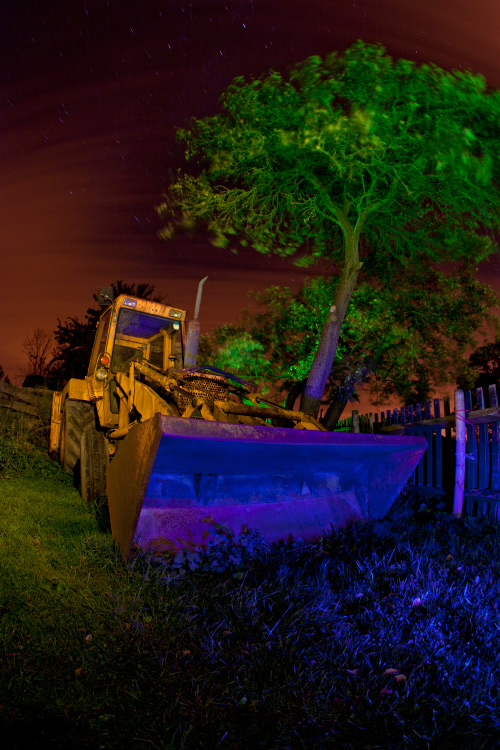
For this particular shot I flashed blue at ¼ power a few times from floor level onto the scoop which lit it up and created some nice contrast in the grass, followed by some yellow and natural flash onto the side of the digger. To bring out the tree more I used a green gel, it appears to have motion blur as the breeze was blowing it as I was flashing it.
Experimentation
One thing I love about night photography is that there is so many different techniques to use to create your own unique picture, I am always on the lookout for new and exciting ways to light up my photographs, a more recent one is using flamed wire wool to give a firework kind of effect, (its a bit more predictable than fireworks) though i’ve still managed to burn myself on countless occasions.
Stacking
Stacking is a process which I use to create bigger and brighter star trails – because bigger Is always better right? The way I shoot this is to set up my ‘lighting shot’ which is done exactly the same as you would for any other shot which I have explained about, followed by leaving your camera to shoot 30 second exposures continuously only exposing the sky.
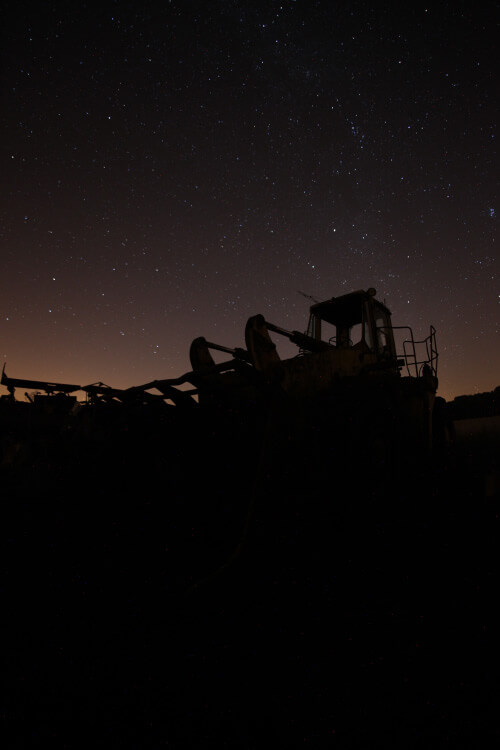
To shoot the sky I will generally use between f/3.5 and f/5.6, I will always use the same focus point as my lighting shot so that the silhouet will be nice and sharp. The image will look like the shot above and you can shoot as many as you want to- I try to leave mine for around 20 minutes or longer, though if you have traveled a long way to your location then you may only want shorter exposures so you can grab as many as possible. I traveled 250 miles for just this one photograph!
There are lots of ways to stack the image together in photoshop and other programs, everyone I know who uses this technique has their own post processing way, there are tons of tutorials over the net so I shall leave you to decide which one to go for.


0 comments:
Post a Comment